👜Connecting Your Wallet
GenaDrop supports a wide array of wallets for multiple blockchains
Using Our App
If you are using GenaDrop, then when you click "Connect Wallet" on the top right corner (or the top of the mobile navbar) will pop up all the blockchains you can connect to.
Once you select a blockchain, you will then have the option to choose the wallet for the blockchain you want to log in with (with the option to create the wallet)
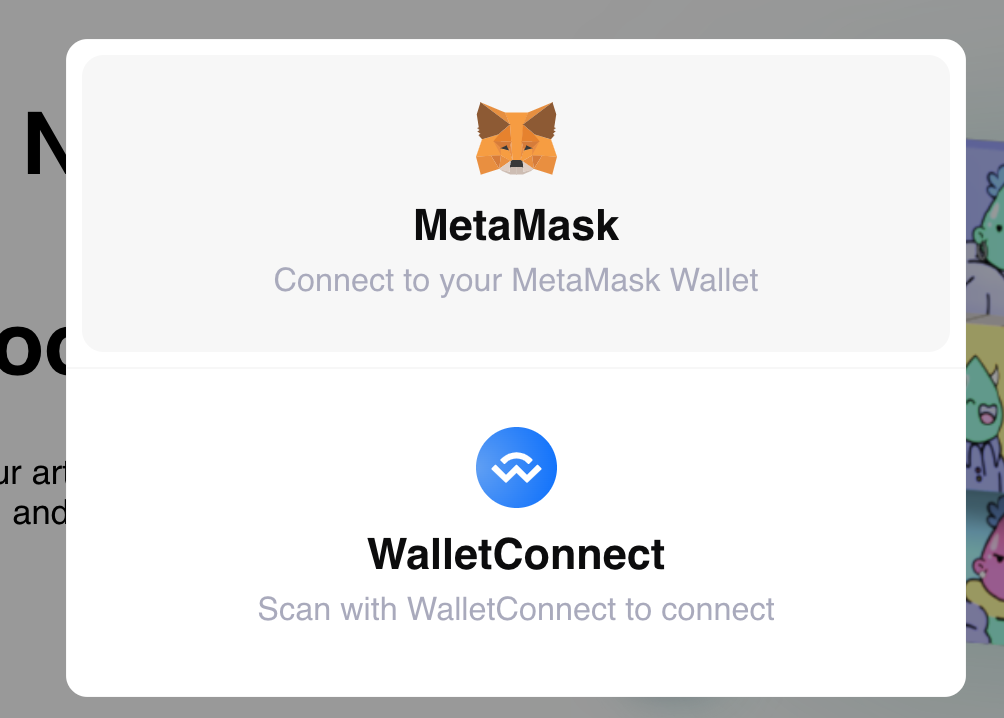
If you are minting, listing/selling, or buying an NFT, based on which blockchain you are minting, listing, selling, or buying from, GenaDrop will automatically recognize this and pull up the instructions for that respective blockchain.
Connecting your Algorand Wallet
Available Algorand Options
Download Pela Algo Wallet on the phone and set up your account - make sure there is enough amount (Algo) - Click Connect Wallet on GenaDrop - select Algorand blockchain, choose Wallet Connect- scan the QR code using the Pera Algo Wallet
Connecting Ethereum Compatible Chains with Metamask (Polygon, Celo, Aurora)
Luckily for you the process for connecting Ethereum compatible chains to your Metamask Wallet is all the same process.
Just some background, all of the listed blockchains are EVM compatible blockchains (meaning they work with same code execution as Ethereum) and adding them are as simple as
Please follow carefully the steps below to setup Metamask and other wallet, also add any of our supported networks to Metamask.
How to download Metamask chrome extension (https://share-docs.clickup.com/d/h/4e6q4-2087/29cf6dd595624ca/4e6q4-2500)
Adding Celo to Metamask and Connecting it to GenaDrop (https://share-docs.clickup.com/d/h/4e6q4-2087/29cf6dd595624ca/4e6q4-2540)
Adding Polygon to Metamask and Connecting it to GenaDrop (https://share-docs.clickup.com/d/h/4e6q4-2087/29cf6dd595624ca/4e6q4-2560)
Adding Aurora(ETH) to Metamask and Connecting it to GenaDrop (https://share-docs.clickup.com/d/h/4e6q4-2087/29cf6dd595624ca/4e6q4-2600)
Setting up PeraAlgo wallet and connecting to GenaDrop (https://share-docs.clickup.com/d/h/4e6q4-2087/29cf6dd595624ca/4e6q4-2680)
How to download Metamask chrome extension
How to Download and set up Metamask wallet
Step 1: Go to Chrome Web Store Extensions Section.
Step 2: Search MetaMask.
Step 3: Click the Add to Chrome button.

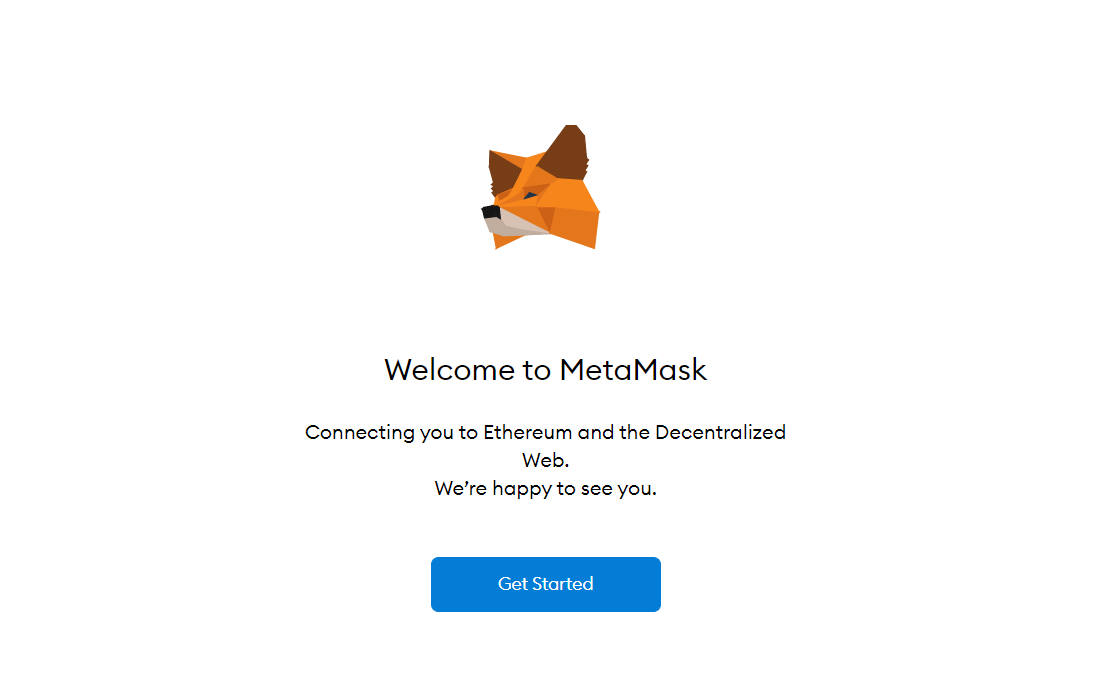
Step 4: Once installation is complete this page will be displayed. Click on the Get Started button.
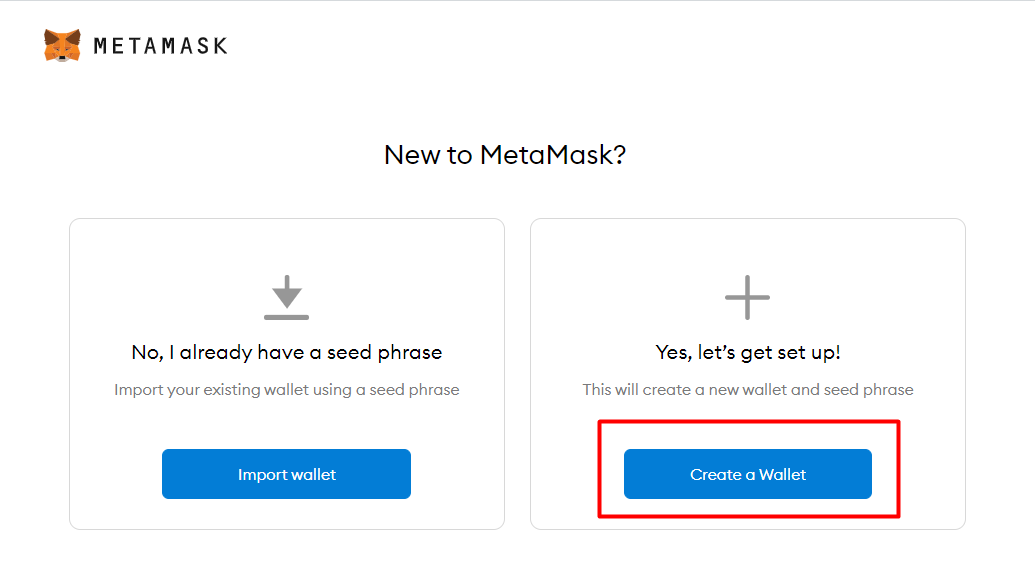
Step 4: If this is the first time creating a wallet, you need to click the Create a Wallet button. If you already have a wallet then import the already created wallet using the Import Wallet button.
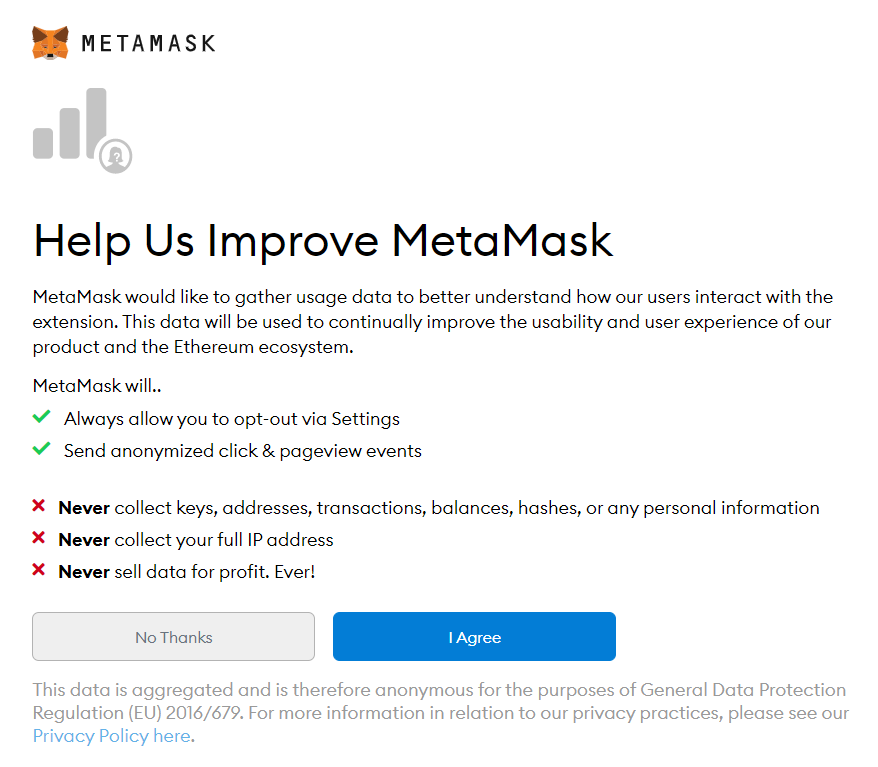
Step 5: Click I Agree button to allow data to be collected to help improve MetaMask or else click the No Thanks button. The wallet can still be created even if the user will click on the No Thanks button.
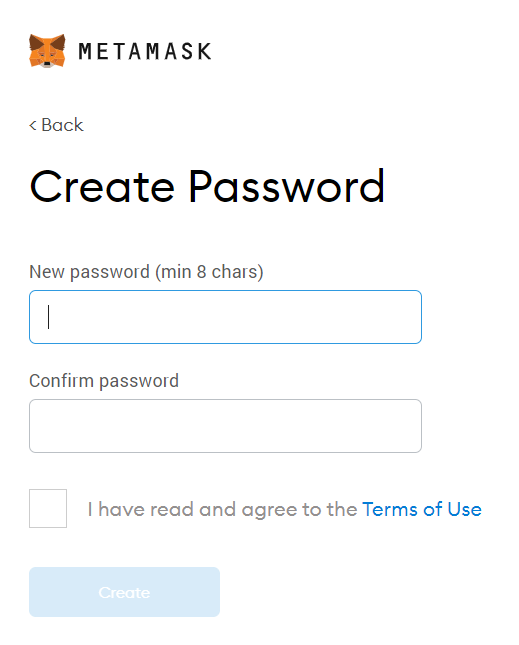
Step 6: Now, go ahead and create a password for your wallet. This password is to be entered every time the browser is launched and wants to use MetaMask. Agree to Terms of Use. By clicking agree
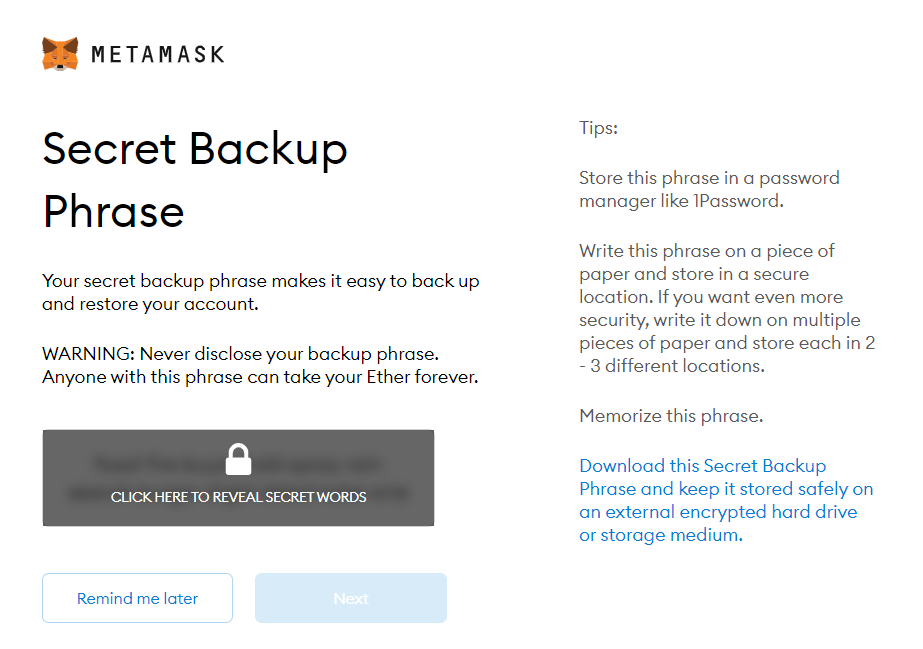
Step 7: This is step is very important. Back up your secret phrase properly. Do not store your secret phrase on your computer, write it down on a piece of paper and store away safely. The secret phrase is the only way to access your wallet if you forget your password. Once done click the Next button.
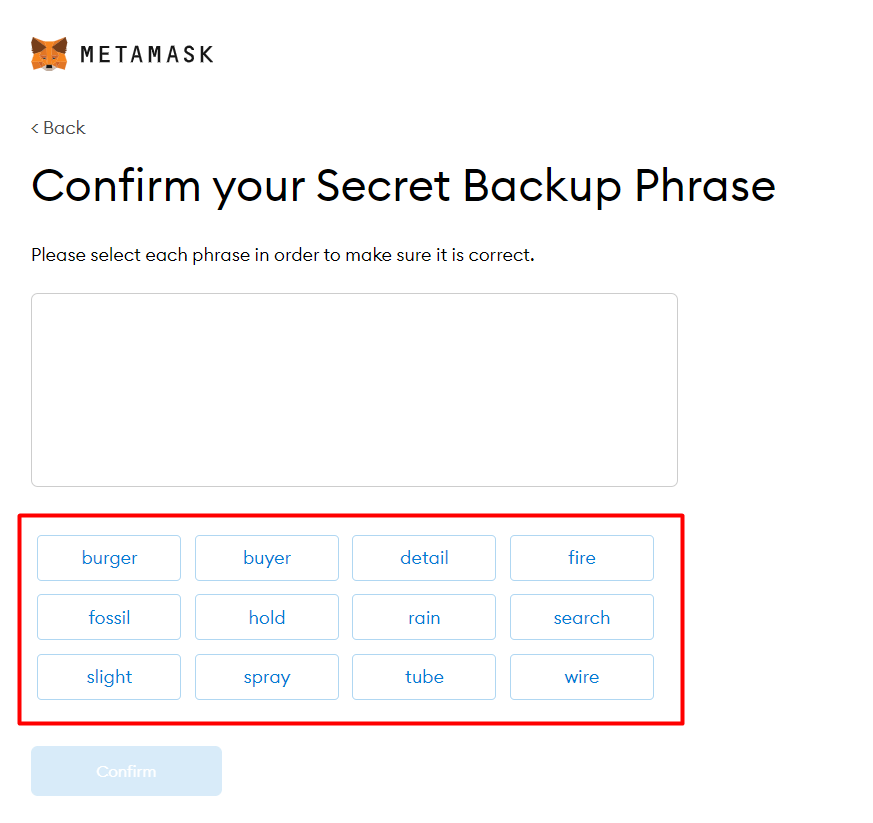
Step 8: Confirm your secret backup phrase by clicking or typing in the words in the order they appeared, the "confirm" button should turn blue when all seed phrase is entered, then click on "confirm"
Step 9: You're almost done, On this screen you will get an "All done" button to finish setting up your wallet, this means seed phrases entered are correct. Click on it and you're done!
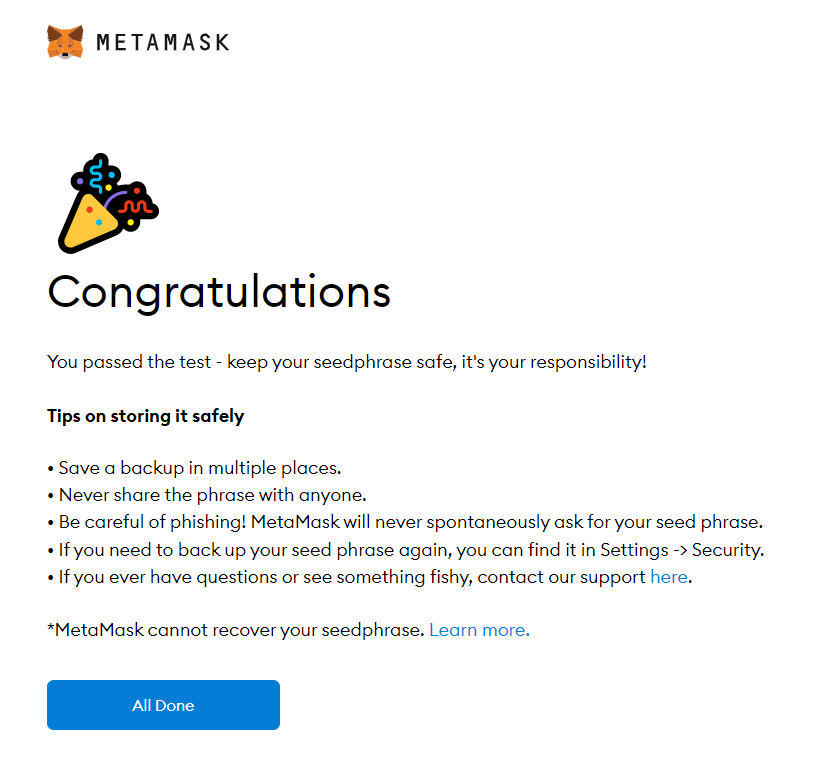
Step 9: You should have a screen like this on successful attempt, you can
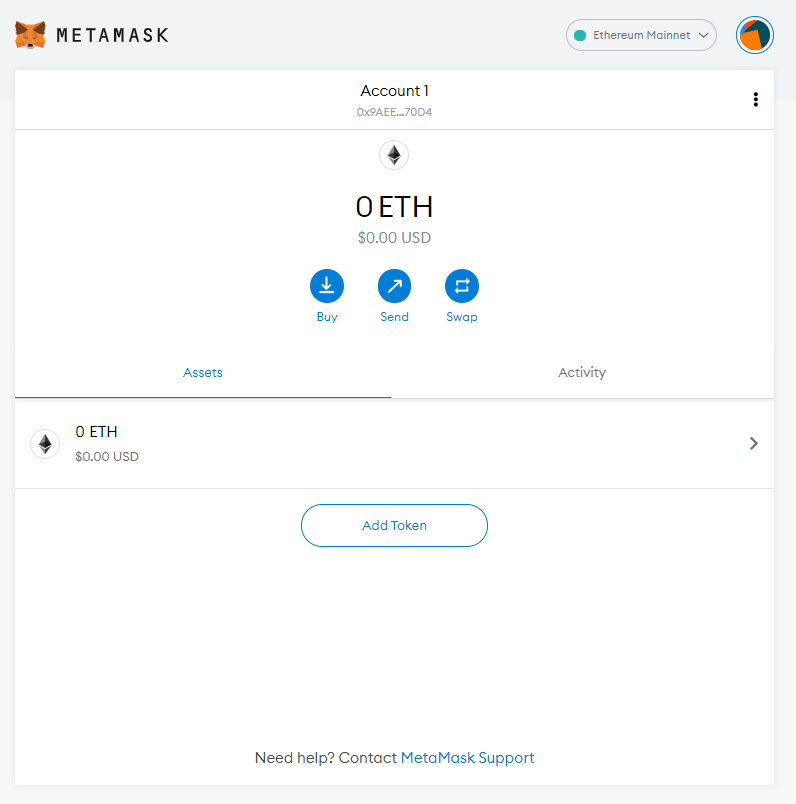
Adding custom token to MetaMask
Open the MetaMask extension in your web browser
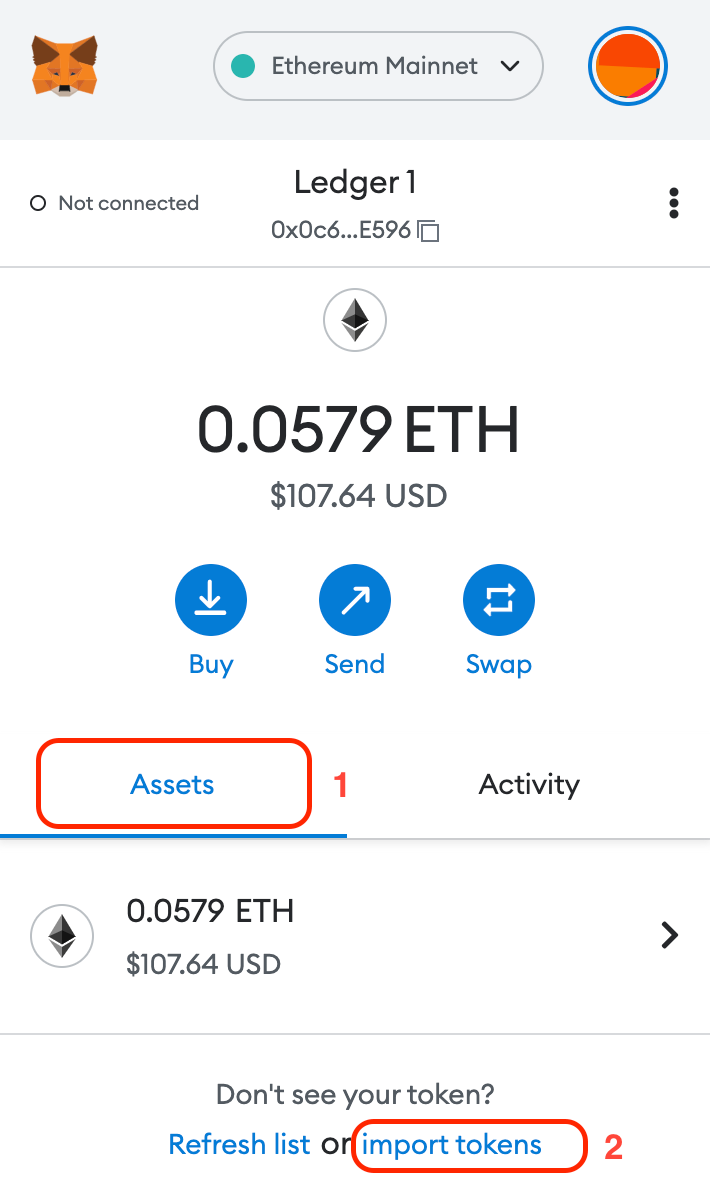
Select the Assets tab.
Scroll down and click Import tokens.
Select the Custom Token tab.
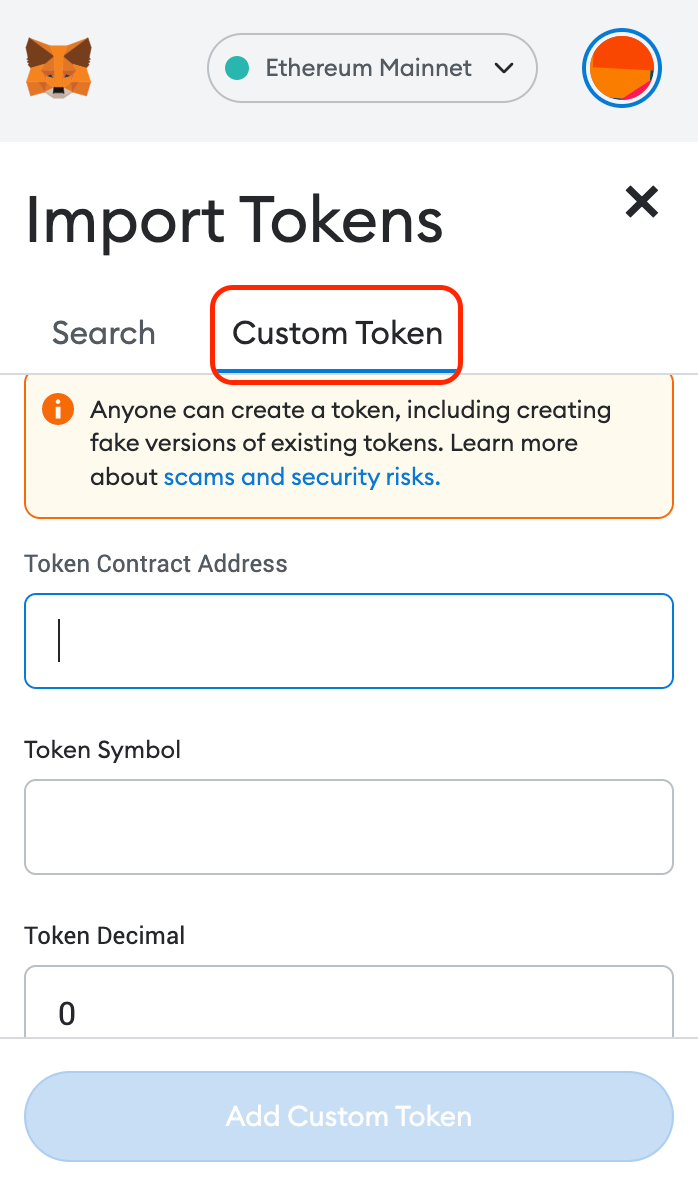
Insert the contract address of the token to the field Token Contract Address.
The token symbol and token decimal will get filled automatically. You can edit it if needed.
Click Add Custom Token.
10. You will see the token information and the balance (if you have these tokens at your address).
11. Click Import Tokens.
12. Congratulations, you added the custom token to MetaMask and it will become visible in the Assets tab in MetaMask.
Adding 3rd Party Token Detection (Metamask)
Not enabling this feature means new tokens sent to you wont be automatically recognized in your wallet. Follow the steps below to enable token detection.
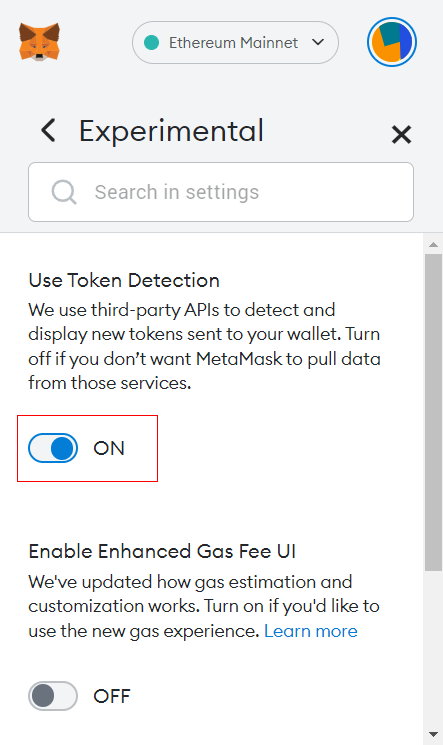
Step 1: Open Metamask and go to settings
Step 2: Click on Experimental tab
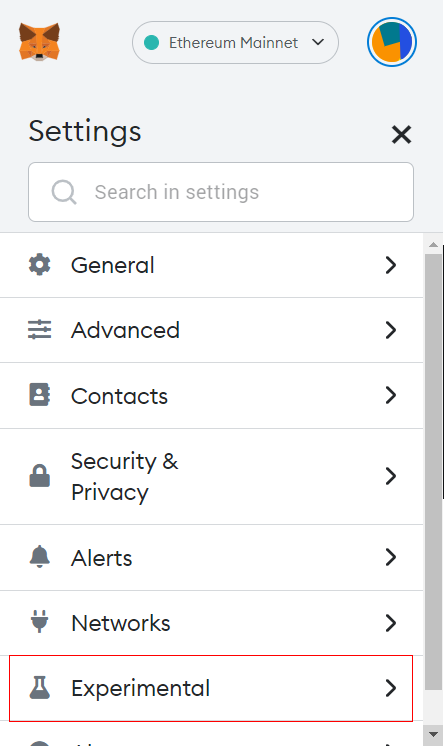
Step 2: Toggle ON the switcher button under Token Detection and that's it!
You have successfully set your Metamask to detect and display third party tokens.
Adding Celo to Metamask and Connecting it to GenaDrop
To be able to connect to Celo network on GenaDrop using Metamask wallet, Firstly, you need to manually add the network on Metamask.
Carefully follow the steps below to add Celo to Metamask, you can also go to Celodevelopers_medium_article to learn more
Step 1: Open Metamask extension
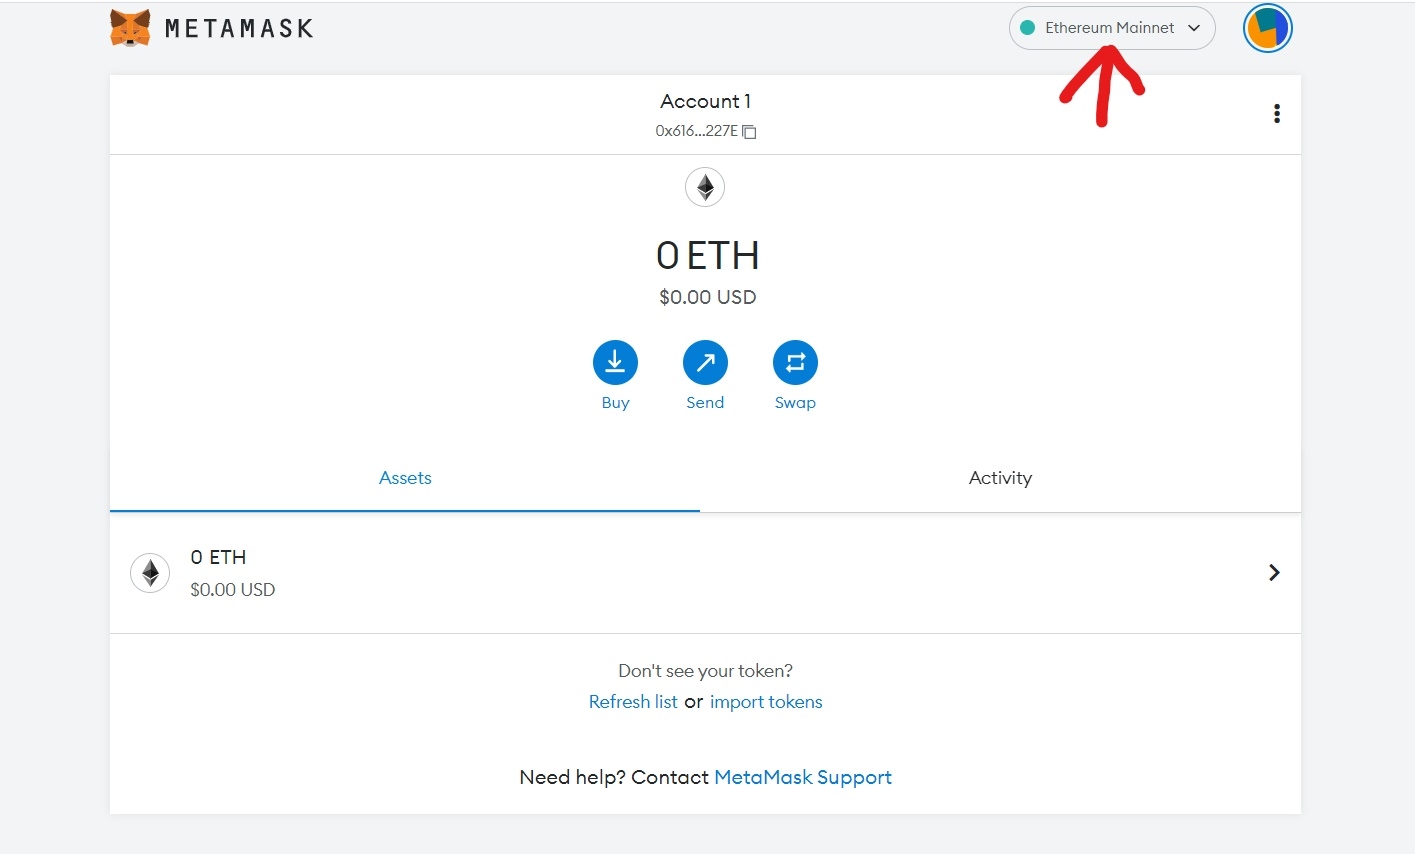
Step 2: Click on the top network button to open a dropdown.
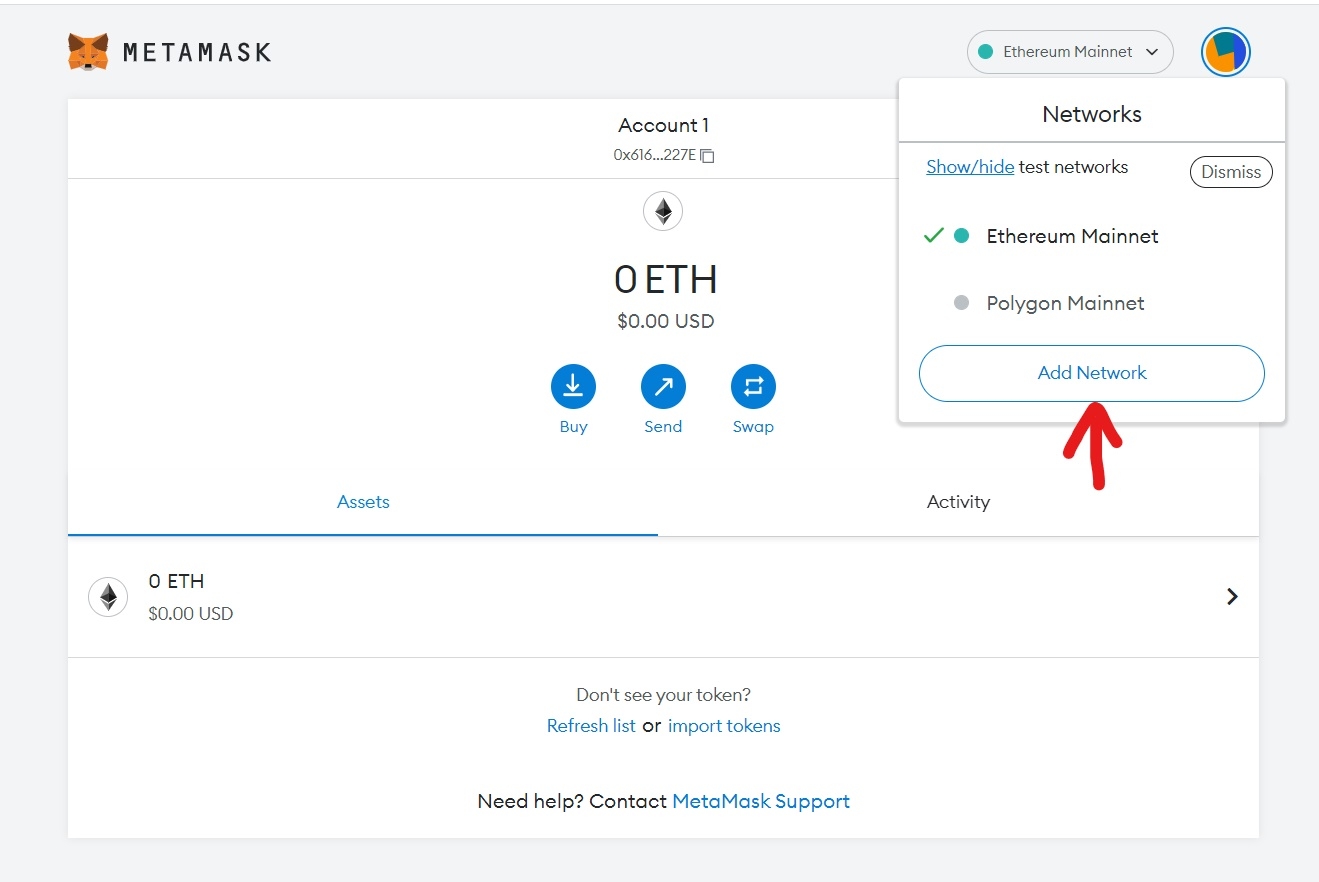
Step 3: Click on "Add network" button
Step 4: Fill the form with this information below to connect to either Mainnnet or Testnet.
For the Celo mainnet, fill in the following details:
Network Name: Celo (Mainnet)
New RPC URL: https://forno.celo.org
Chain ID: 42220
Currency Symbol (Optional): CELO
Block Explorer URL (Optional): https://explorer.celo.org
For the Alfajores Testnet, fill in the following details:
Network Name: Celo (Alfajores Testnet)
New RPC URL: https://alfajores-forno.celo-testnet.org
Chain ID: 44787
Currency Symbol (Optional): CELO
Block Explorer URL (Optional): https://alfajores-blockscout.celo-testnet.org
For the Baklava Testnet, fill in the following details:
Network Name: Celo (Baklava Testnet)
New RPC URL: https://baklava-forno.celo-testnet.org
Chain ID: 62320
Currency Symbol (Optional): CELO
Block Explorer URL (Optional): https://baklava-blockscout.celo-testnet.org
Step 5: When you're done filling the form correctly, click on "Add" button, you should have a success screen like this telling you that Celo network have been added to your Metamask successfully.
After you have added Celo network you can now connect your wallet to GenaDrop
To do that simply
Step 1: Go to Genadrop.io
Step 2: Click on the "connect wallet" on the top right navbar
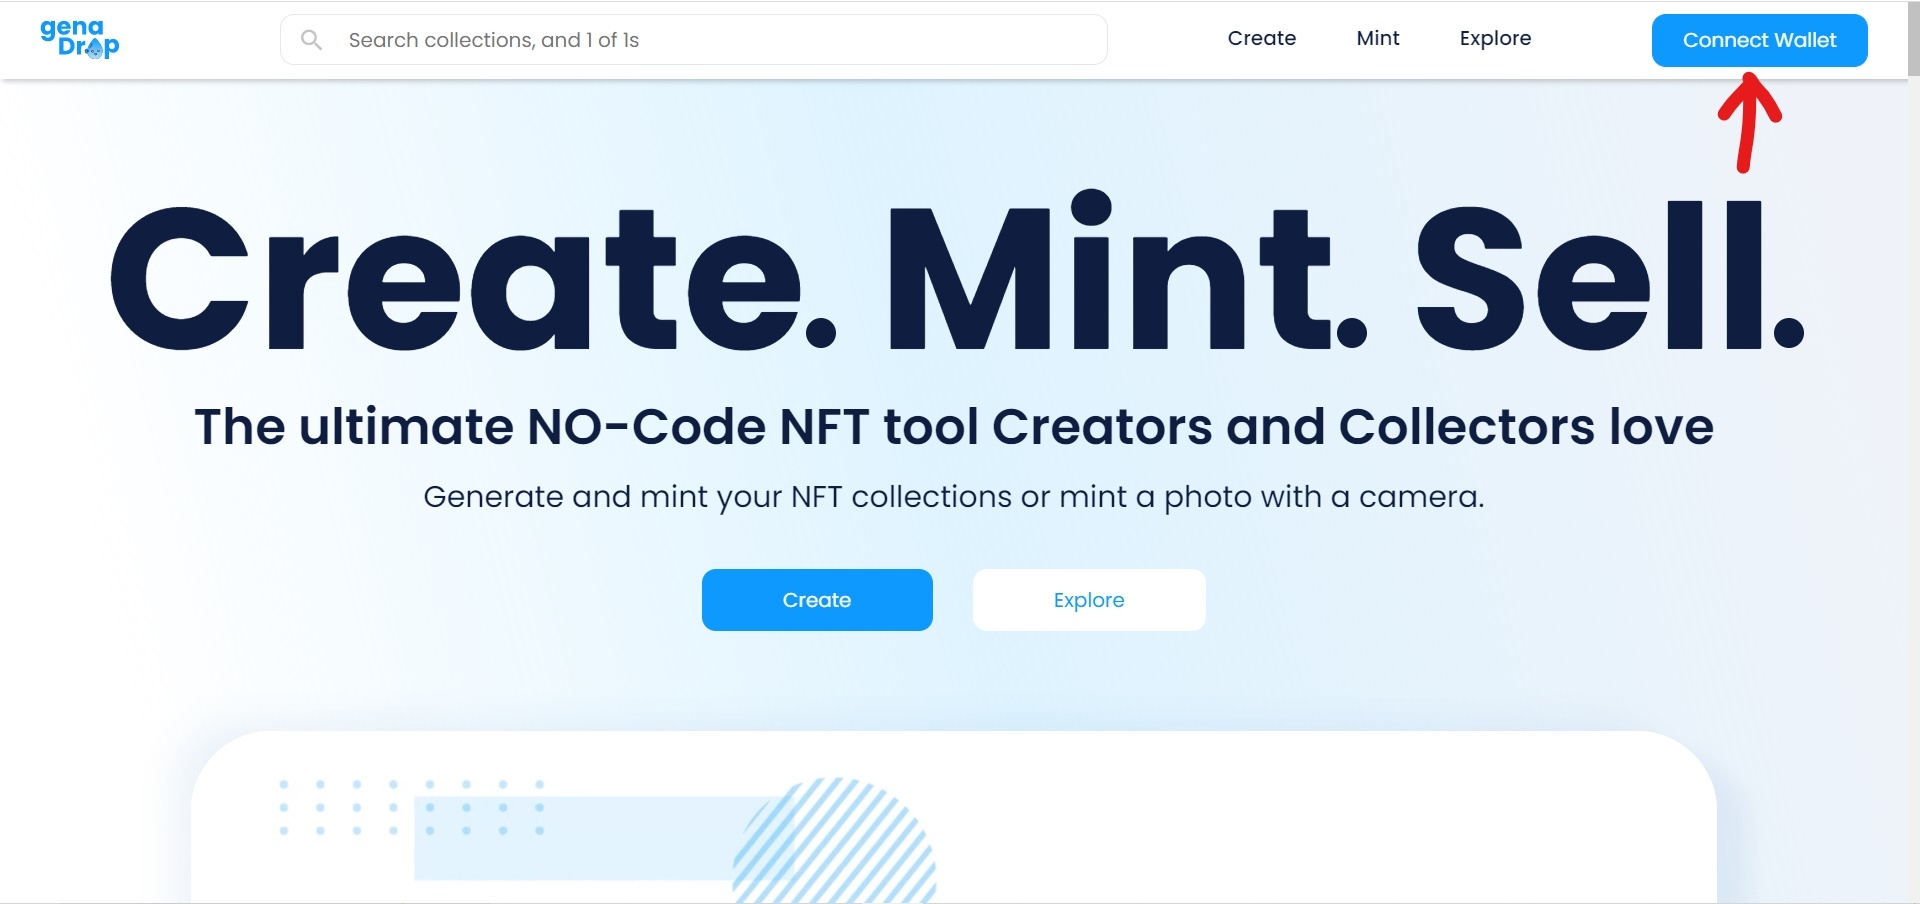
Step 3: Select Celo from the list of available networks
Step 4: Choose a wallet provider, click on Metamask
Step 5: Switch network if there's need from metamask
Step 6: You're almost done, click "Next" button
Step 7: Confirm connecting to GenaDrop by clicking on "confirm" button
Step 8: You're done! You have successfully connected your Celo wallet to GenaDrop using Metamask.
Get free tokens to mint on Celo
Celo (Alfajores Testnet)
We'll walk you through the steps of acquiring Celo via a Alfajores Testnet Faucet.
Step 1: Adding Celo's Alfajores Testnet to MetaMask wallet
Open MetaMask browser extension
Click on the Network selection dropdown and then click on 'Add Network'
Fill in the form
Step 2: Getting the Tokens
In your MetaMask wallet, ensure that the Alfajores Testnet network is selected.
Copy your wallet address.
Go to "https://alfajores-forno.celo-testnet.org/," paste your wallet address into the appropriate field, and then submit.
You will receive free tokens almost immediately
Adding Polygon to Metamask and Connecting it to GenaDrop
Like every other Ethereum EVM chains, you can add polgon to Metamask wallet and connect to GenaDrop
Follow the instructions on the link below to add Polygon to your Metamask
[
Add Polygon Network | Polygon Technology | Documentation
Integrate Polygon with Metamask.
https://docs.polygon.technology/docs/develop/metamask/config-polygon-on-metamask/
](https://docs.polygon.technology/docs/develop/metamask/config-polygon-on-metamask/)
After you have added Polygon network you can now connect your wallet to GenaDrop
To do that simply
Step 1: Go to Genadrop.io
Step 2: Click on the "connect wallet" on the top right navbar

Step 3: Select Polygon from the list of available networks
Step 4: Choose a wallet provider, click on Metamask
Step 5: Switch network if there's need
Step 6: You're almost done, click "Next" button
Step 7: Confirm connecting to GenaDrop by clicking on "confirm" button
Step 8: You're done! You have successfully connected your Polygon wallet to GenaDrop using Metamask.
Get free tokens to mint on Polygon
Polygon (Mumbai Testnet)
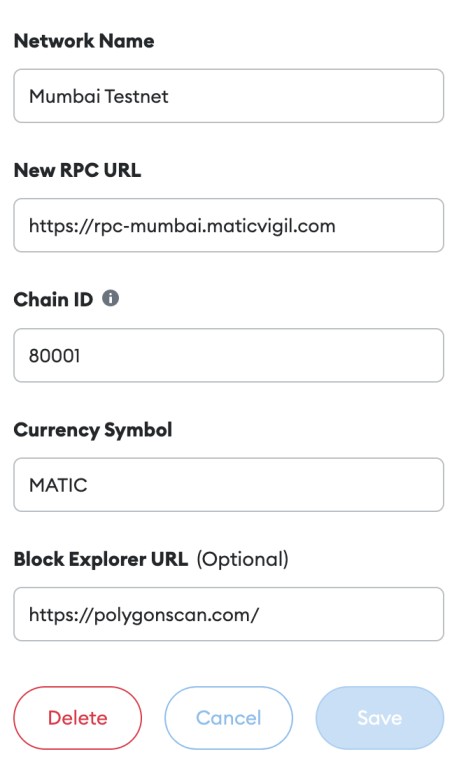
We'll walk you through the steps of acquiring MATIC via a Mumbai Testnet Faucet.
Step 1: Adding Polygon's Mumbai testnet to MetaMask wallet
Open MetaMask browser extension
Click on the Network selection dropdown and then click on 'Add Network'
Fill in the form
Step 2: Getting the Tokens
In your MetaMask wallet, ensure that the Mumbai Testnet network is selected.
Copy your wallet address.
Go to "https://faucet.polygon.technology," paste your wallet address into the appropriate field, and then submit.
You will receive free tokens almost immediately
Adding Aurora(ETH) to Metamask and Connecting it to GenaDrop
To be able to connect to Aurora network on GenaDrop using Metamask wallet, you need to first add Aurora to your Metamask.
Follow the below steps to add Aurora to Metamask or visit https://autofarm.gitbook.io/autofarm-network/how-tos/aurora-chain/metamask-add-aurora-chain
Step 1: Open Metamask extension
Step 2: Click on the top network button to open a dropdown.

Step 3: Click on "Add network" button

Step 4: Fill the form with this information below to connect to either Mainnnet or Testnet.
For the Aurora Mainnet, fill in the following details:
Network Name: Aurora (Mainnet)
New RPC URL: https://mainnet.aurora.dev/
Chain ID: 1313161554
Currency Symbol (Optional): ETH
Block Explorer URL (Optional): https://explorer.mainnet.aurora.dev/
For the Aurora Testnet, fill in the following details:
Network Name: Aurora (Testnet)
New RPC URL: https://testnet.aurora.dev/
Chain ID: 1313161555
Currency Symbol (Optional): ETH
Block Explorer URL (Optional): https://testnet.aurora.dev
Get free tokens to mint on Polygon
Visit https://aurora.dev/faucet and connect your Metamask wallet.
Note: You need to have enough ETH on your wallet for the dispenser to actually dispense faucets to the wallet address you just connected to the website.
If you need more ETH you can send ETH to Aurora using https://rainbowbridge.app/
After connecting your wallet, click on Request 0.0005ETH
That's it! the faucet will be sent to your wallet
Setting up PeraAlgo wallet and connecting to GenaDrop
Follow the below steps to setup your PeraAlgo wallet
Step 1: Download the PeraAlgo app from App Store or Play Store
Step 2: Launch the App
Step 3: On the next step tap on " I want to create an account " however if you already have an account you import using Passphrase you safely stored.
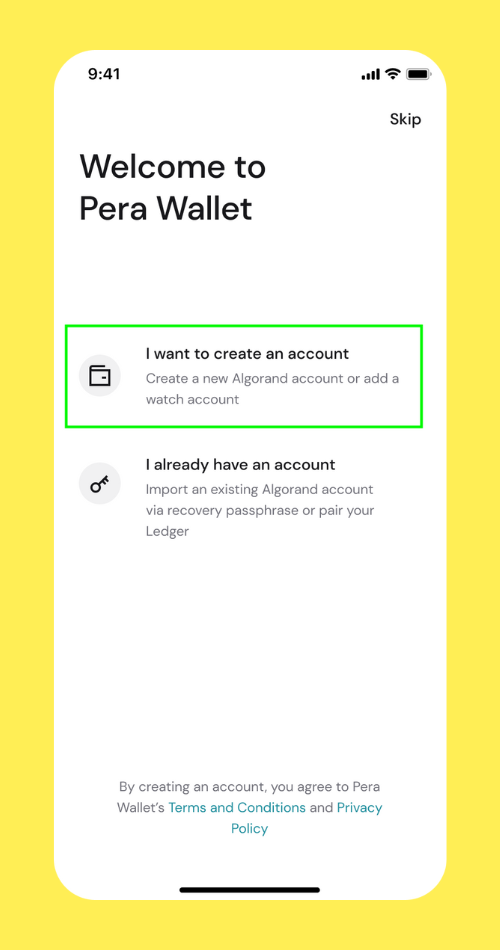
Step 4: On the next screen select "Create New Account" to begin the flow!
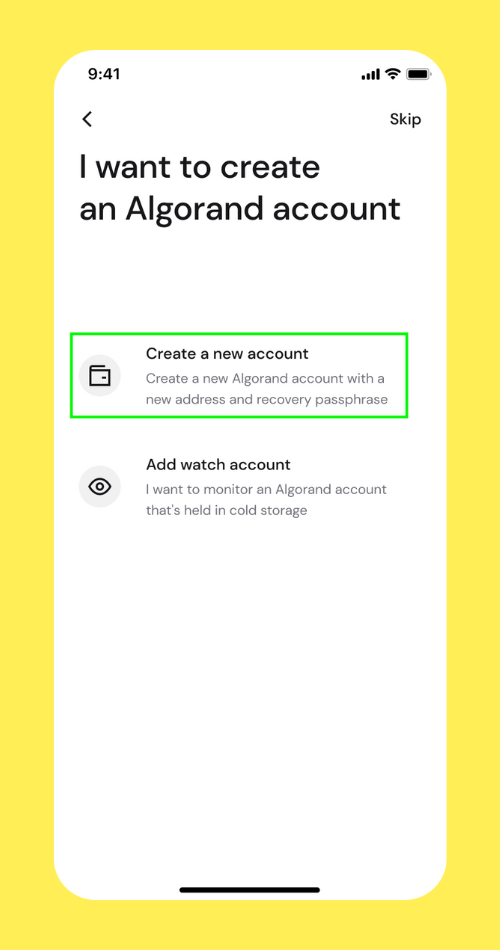
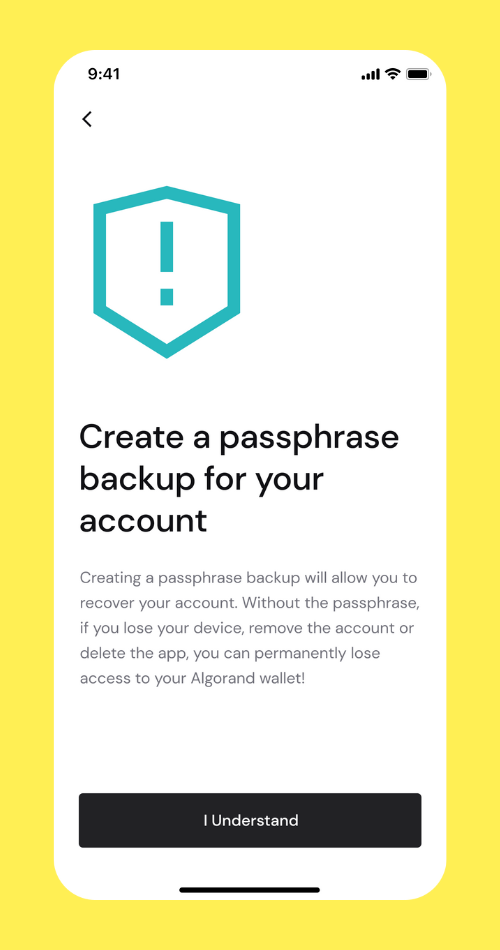
Step 5: At this point, you'll see a couple of screens that give you information about the upcoming backup process. ⚠️ Please review these screens carefully so that you're prepared to write down your passphrase and store it securely.
Review the account creation overview screen and tap "I understand."
Step 6: Review the important prep details before tapping "I'm ready to begin."
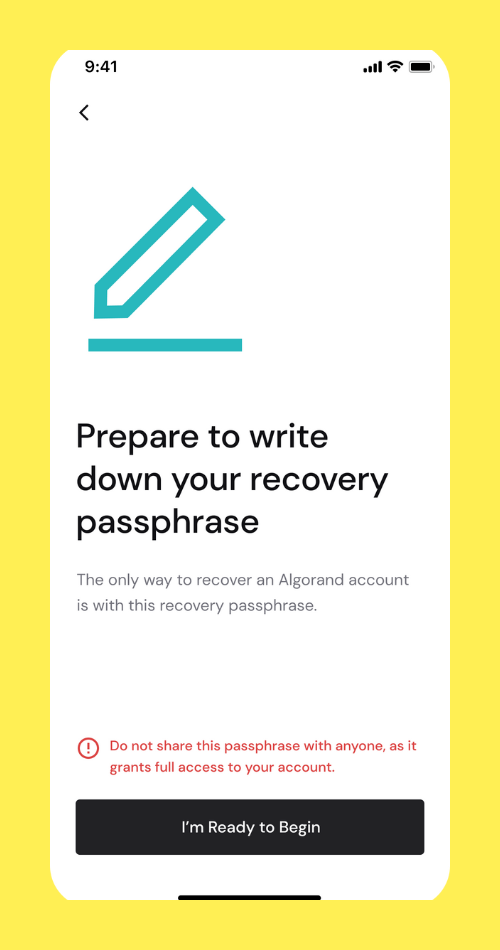
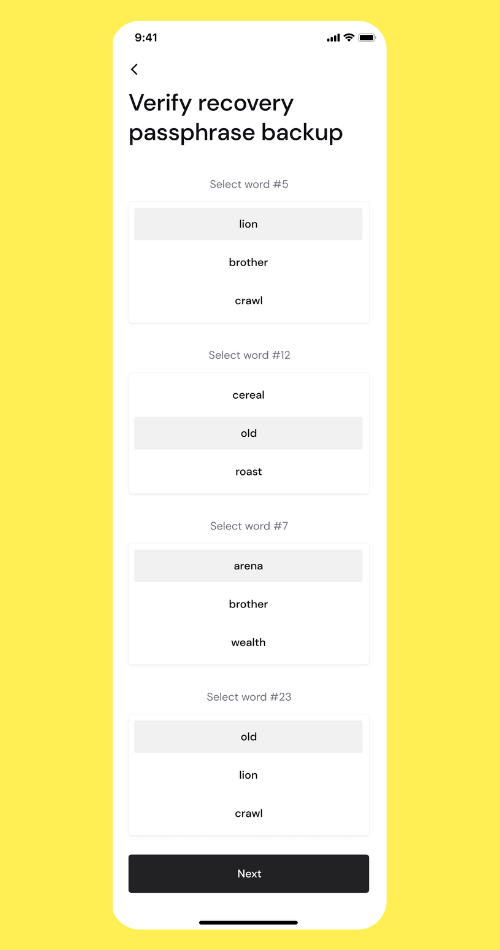
Step 7: At this point, PeraAlgo wallet will show you your 25-word recovery passphrase. There is no screenshot of this page or at least they've disable it, you need to carefully write this down on paper and store safely.
You'll then verify the passphrase has been recorded successfully by selecting a few key words in the phrase.
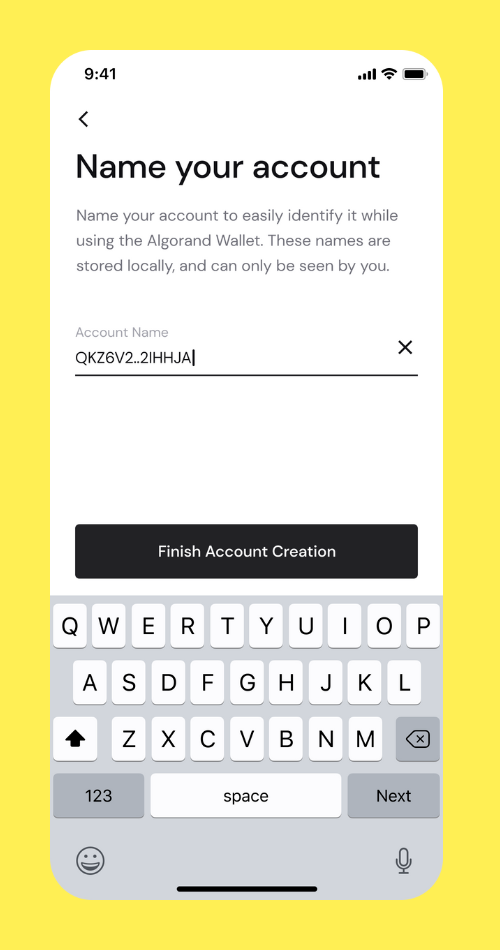
Step 8: Name your account: at this point, you can name your account for convenience. It will help you keep organized between your different accounts. This doesn't interact with the blockchain at all, it's merely an organizational feature.
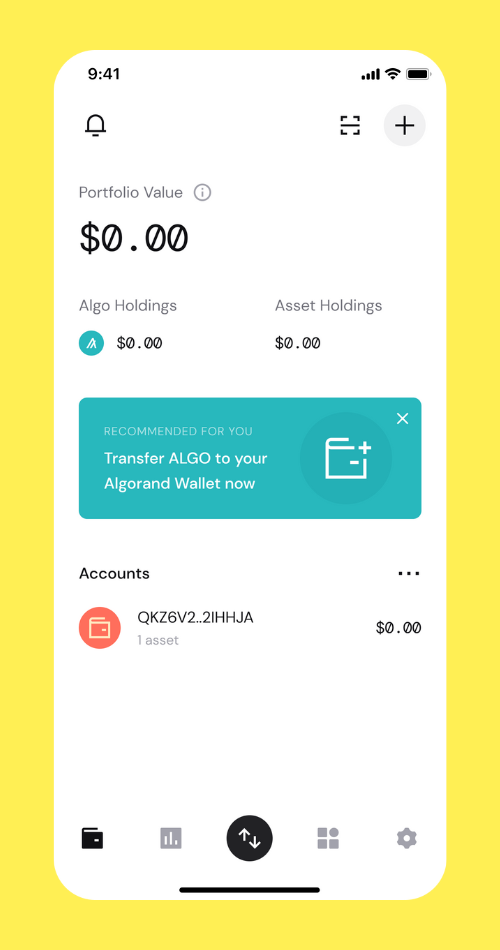
That's it! You should see the newly created account on your Accounts view. If this was your first time creating an account, you'll only see 1 account. You can now navigate through the App, add Algos or other assets, and send/receive transactions to other wallets address.
How to connect your Algorand wallet to GenaDrop
To do that
Step 1: Go to Genadrop.io
Step 2: Click on the "connect wallet" on the top right navbar

Step 3: Select Algorand from the list of available networks
Step 4: Choose a wallet provider, click on WalletConnect
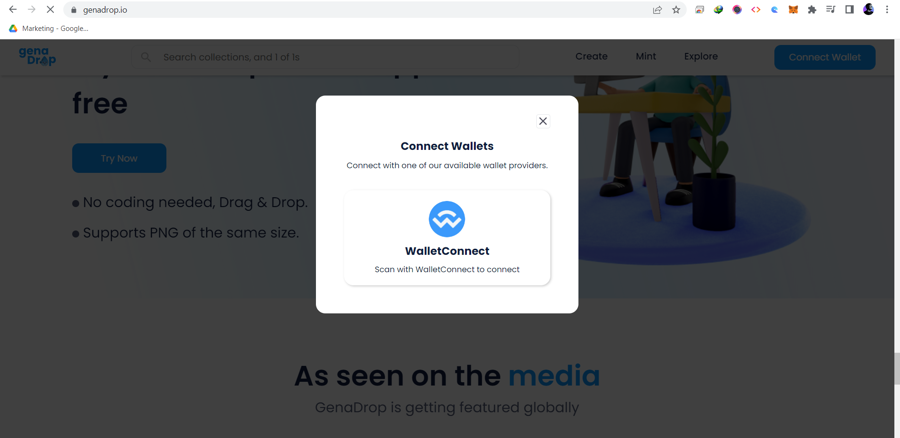
Step 5: Open your PeraAlgo wallet and select "Scan QR" feature
Now, Scan this QR code using your mobile PeraAlgo wallet, if successful, you Algorand wallet will automatically be connected to GenaDrop. That's it!
Get free tokens to mint on Algorand
Algorand
We'll walk you through the steps of acquiring Algo faucet via https://bank.testnet.algorand.network/ or https://testnet.algoexplorer.io/dispenser
Step 1: Launch the PeraAlgo app on your mobile phone
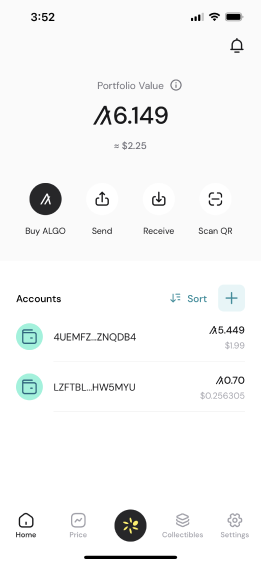
Step 2: Select a wallet you want o fund with Algo token from Account list
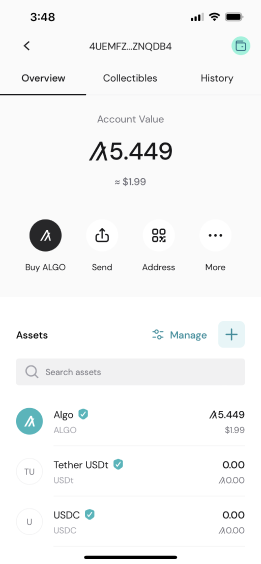
Step 3: Click on the top-right wallet icon
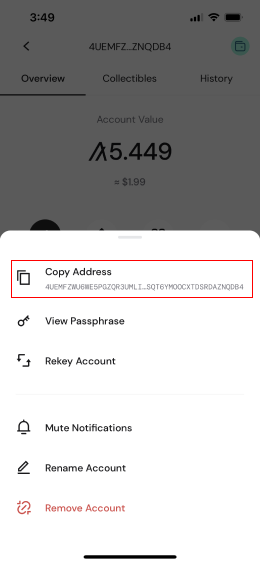
Step 4: Click on "copy address" from the pop-up.
Now you have successfully copied your wallet address, visit any of these ALGO dispenser website, https://bank.testnet.algorand.network/ or https://testnet.algoexplorer.io/dispenser paste your wallet address in the appropriate box and submit. You will get free ALGO token almost immediately.
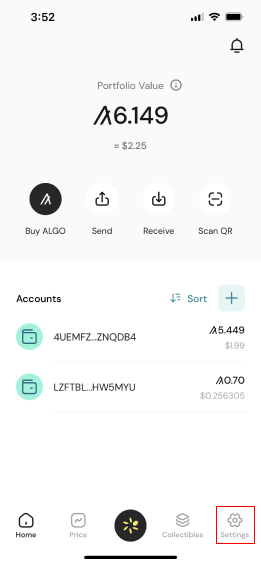
Step 5: To be able to use the faucets to mint to Algorand blockchain on Genadrop, you need to switch from Mainnet to Testnet on your PeraAlgo wallet. To do that click the settings icon on your PeraAlgo app.
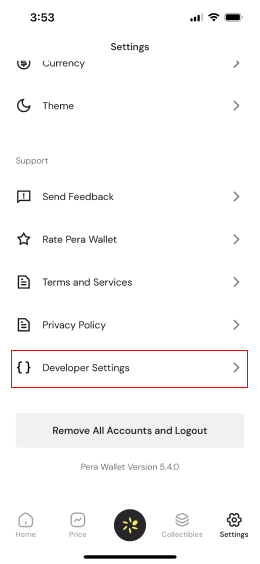
Step 6: Scroll down and click on developer settings
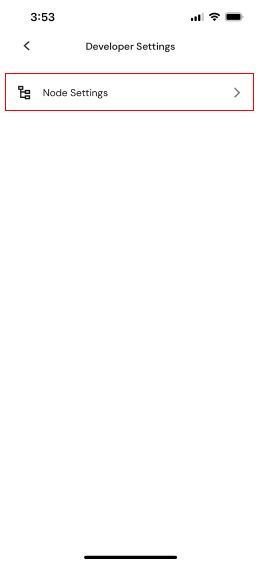
Step 7: Click node settings
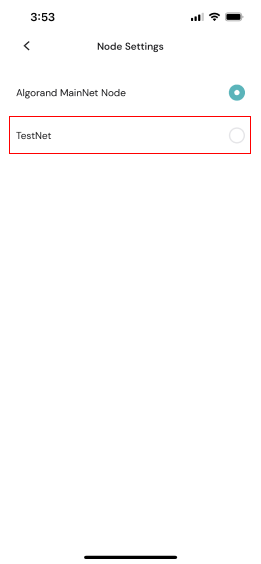
Step 7: Last step, select TestNet from the given options.
Now, you will see the faucets reflect on your wallet balance
Note: This token can only be used on Algorand testnet.
You can follow the same step to switch back to mainnet anytime.
How to switch networks
One huge benefit of Genadrop is that it's a multichain platform that allows you to connect and switch to different blockchain to suit whatever transaction you wish to carry out.
Let's work you through on how switch to different networks.
Connect to
Available Blockchains
Currently GenaDrop is available in the following networks
Mainnet
Testnet: Mumbai
GenaDrop Marketplace Filter Link:
Mainnet
Testnet
GenaDrop Marketplace Filter Link:
Mainnet
Testnet
GenaDrop Marketplace Filter Link:
Mainnet:
Testnet:
GenaDrop Marketplace Filter Link:
NEAR (Coming Soon)
Mainnet:
Testnet:
GenaDrop Marketplace Filter Link:
Mainnet:
Testnet:
GenaDrop Marketplace Filter Link:
Solana (Coming Soon)
Are you interested in seeing another blockchain added to GenaDrop? Please give us feedback so we can make minting NFTs more accesible to more people.
Last updated